
Installing the script
Set up your consent banner
What this does
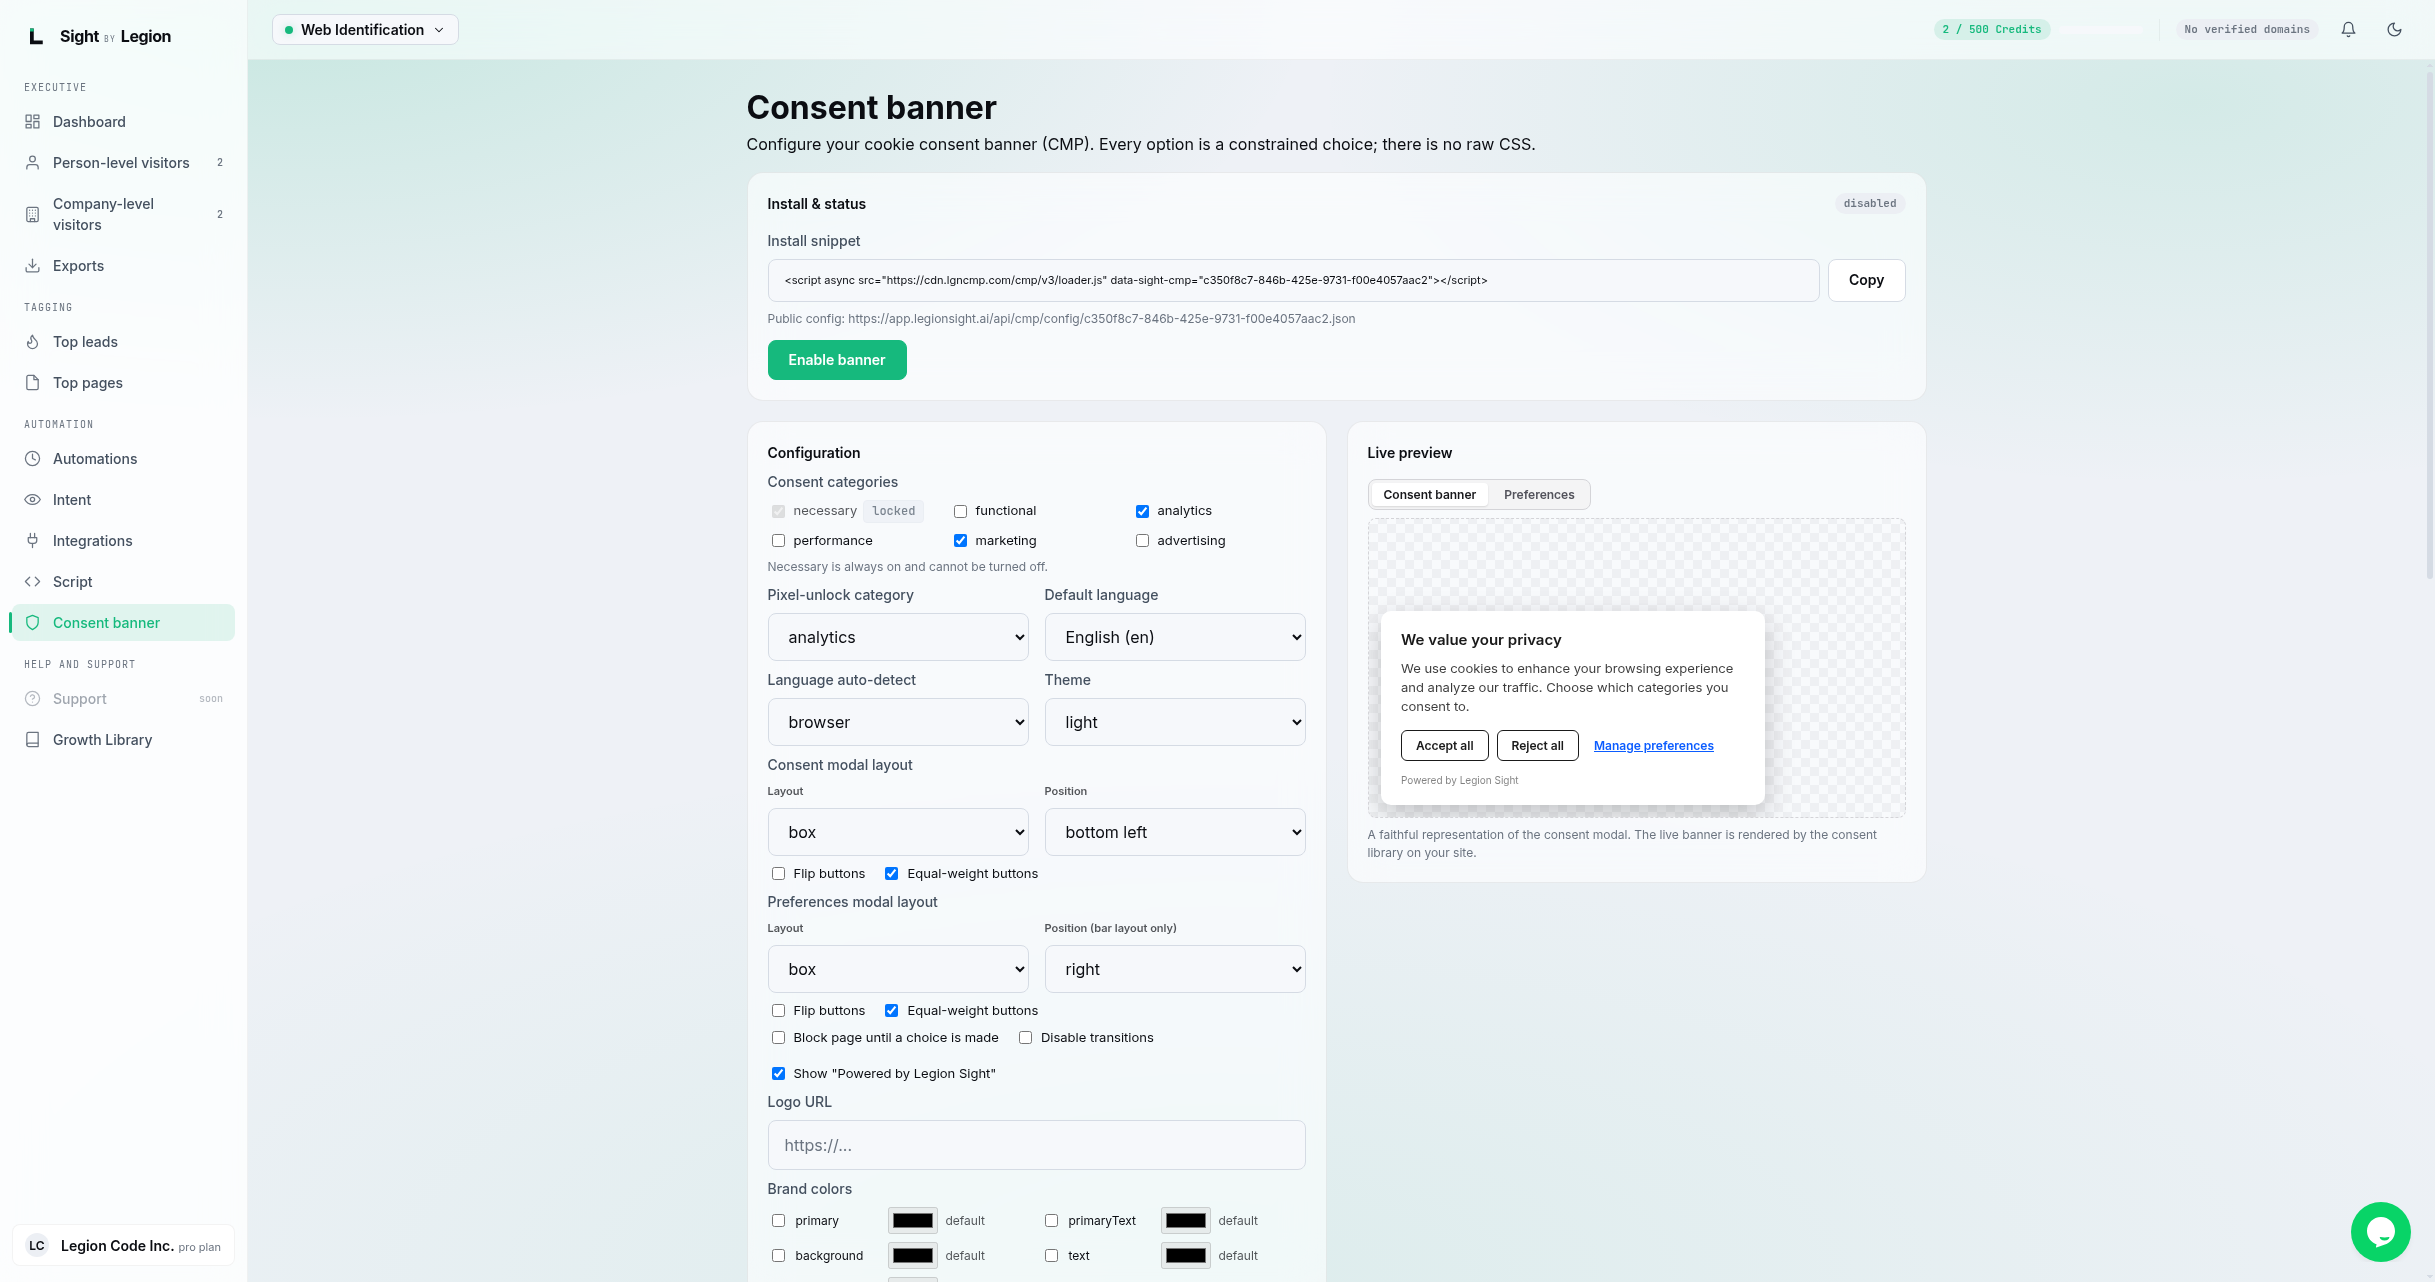
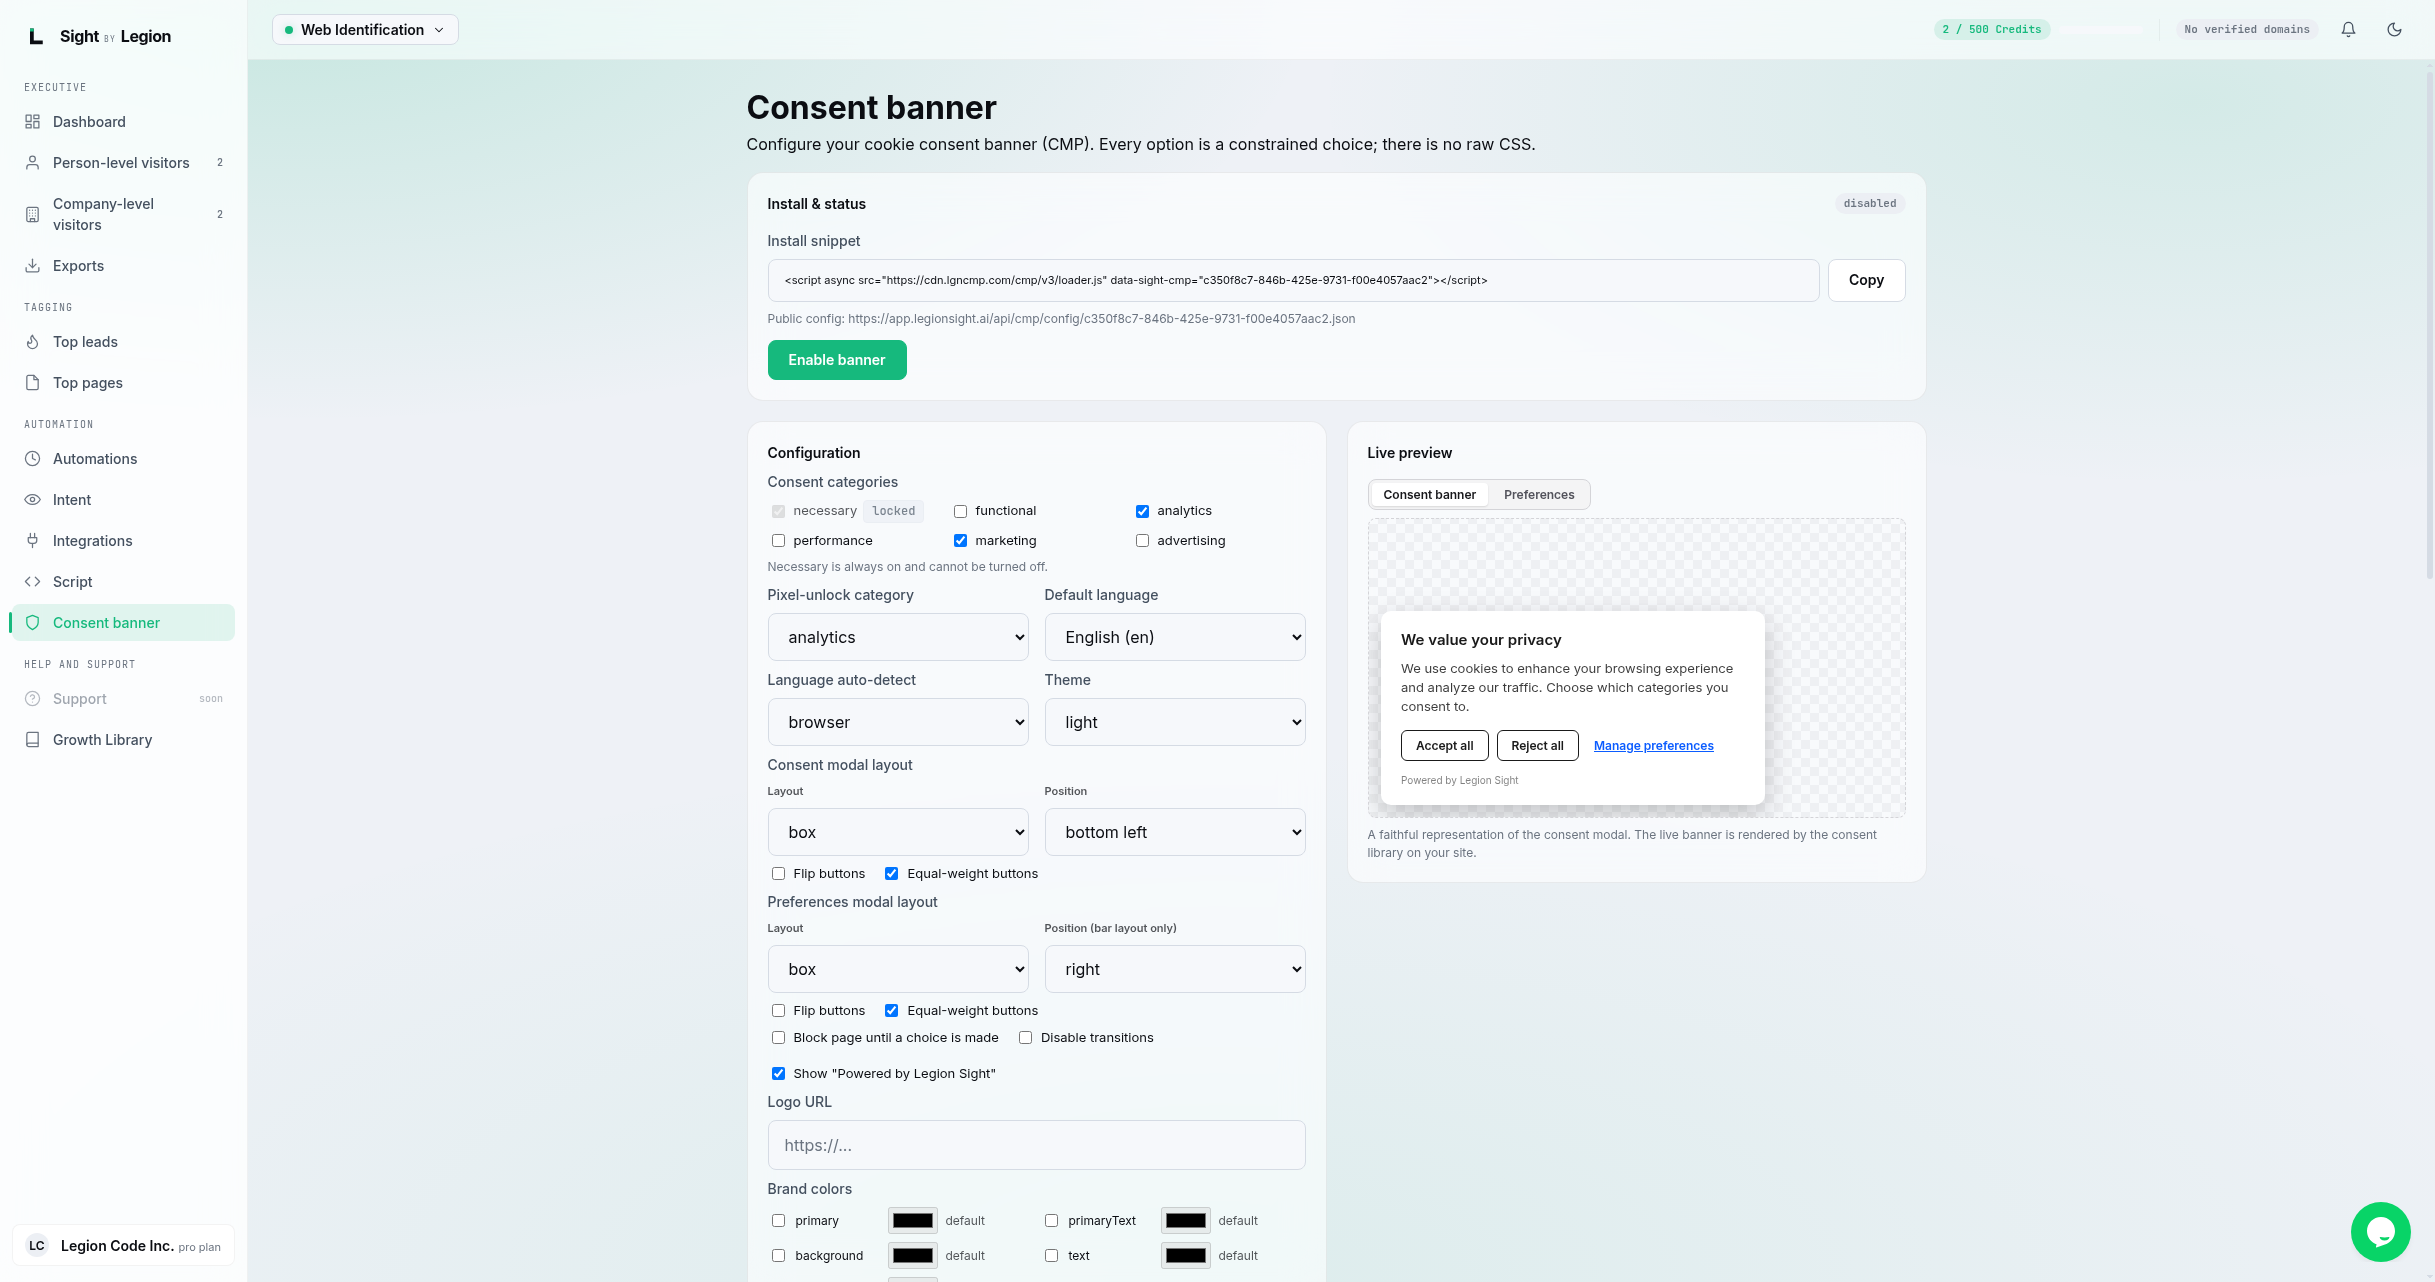
Configures a cookie consent banner (a CMP) that you can install on your site. Every option is a guided choice (dropdowns, toggles, a category checklist, a bounded color picker, a logo URL, and translations). There is no raw CSS to write. A live preview shows your changes as you make them.
Steps
- Open Account menu -> Compliance -> Consent Banner.
- Your banner installs through the same tag as your tracking pixel, so there is no separate banner snippet. The Install & status panel shows that one tag with a Copy button (the same tag as the Script page) and the public config URL for reference. If the tag is already on your site, enabling the banner below is all you need to do; otherwise see Install the tag.
- In the Configuration panel, set your options:
- Consent categories: choose which categories visitors can consent to. Necessary is always on and cannot be turned off.
- Pixel-unlock category: pick the category that, once accepted, unlocks the OSPRY pixel (or leave it as "none" to keep the pixel gated).
- Default language and Language auto-detect.
- Theme (for example, light or dark).
- Consent modal layout and Preferences modal layout: layout, position, and the flip/equal-weight button options.
- Display options: block the page until a choice is made, disable transitions, and show or hide "Powered by OSPRY".
- Logo URL and Brand colors (each color is a bounded picker; you can leave any token on the theme default).
- Translations: edit the banner text per language.
- Watch the Live preview to confirm the look and copy.
- Click Save banner config (or Create banner config the first time).
- When you are ready to show it to visitors, use Enable banner in the Install & status panel. To stop showing it, use Disable banner.
Tips & FAQs
- Enabling and disabling take effect quickly. When you enable or disable the banner, it can take up to about 5 minutes to reach your installed site. You will be asked to confirm before the change applies.
- Why it matters. If you identify visitors outside the US, you must run a consent tool that gates the OSPRY script until the visitor accepts. This banner is one way to meet that requirement. See Geo restrictions and consent.
- No raw CSS by design. Colors are bounded tokens and every control is a constrained choice, so you cannot break the banner with custom styling. The server validates your config when you save.
- Not on your plan? If the consent banner is not included in your plan, the page says so and tells you to contact us to enable it.
- Members can view the banner but cannot change it.